This “classic” commercial Hobart mixer stopped working. Actually it started sparking, BAD, at the switch. And then it wouldn’t work.

I did a little research online and found out a common failure point on these old mixers is the switch itself. The older style switches can only take so many on – off cycles and then burn out.
I also found out that this exact Model unit, the D300T, “specification” # 8087 (on mixer plate tag) was actually built circa 1966! Way older than we thought.
I did some disassembly on the mixer unit, and pulled out the whole switch panel and what do you think I found?

Quick disclaimer: I am NOT an electrician or a licensed electrician. I enjoy electrical theory and working with electrical wiring as a bit of a hobby and figuring out how things work. I wired up 6 circuits including a 3 phase 240V, (2) 220V circuits at my “friend’s” commercial kitchen. I also drafted up a very nice wiring plan for the building permit and was accepted on the first submission to the picky building inspector. I know a few things but there’s lots to learn and lots I don’t know. Consider this “entertainment purposes”. UNPLUG mixer before attempting any work on it!
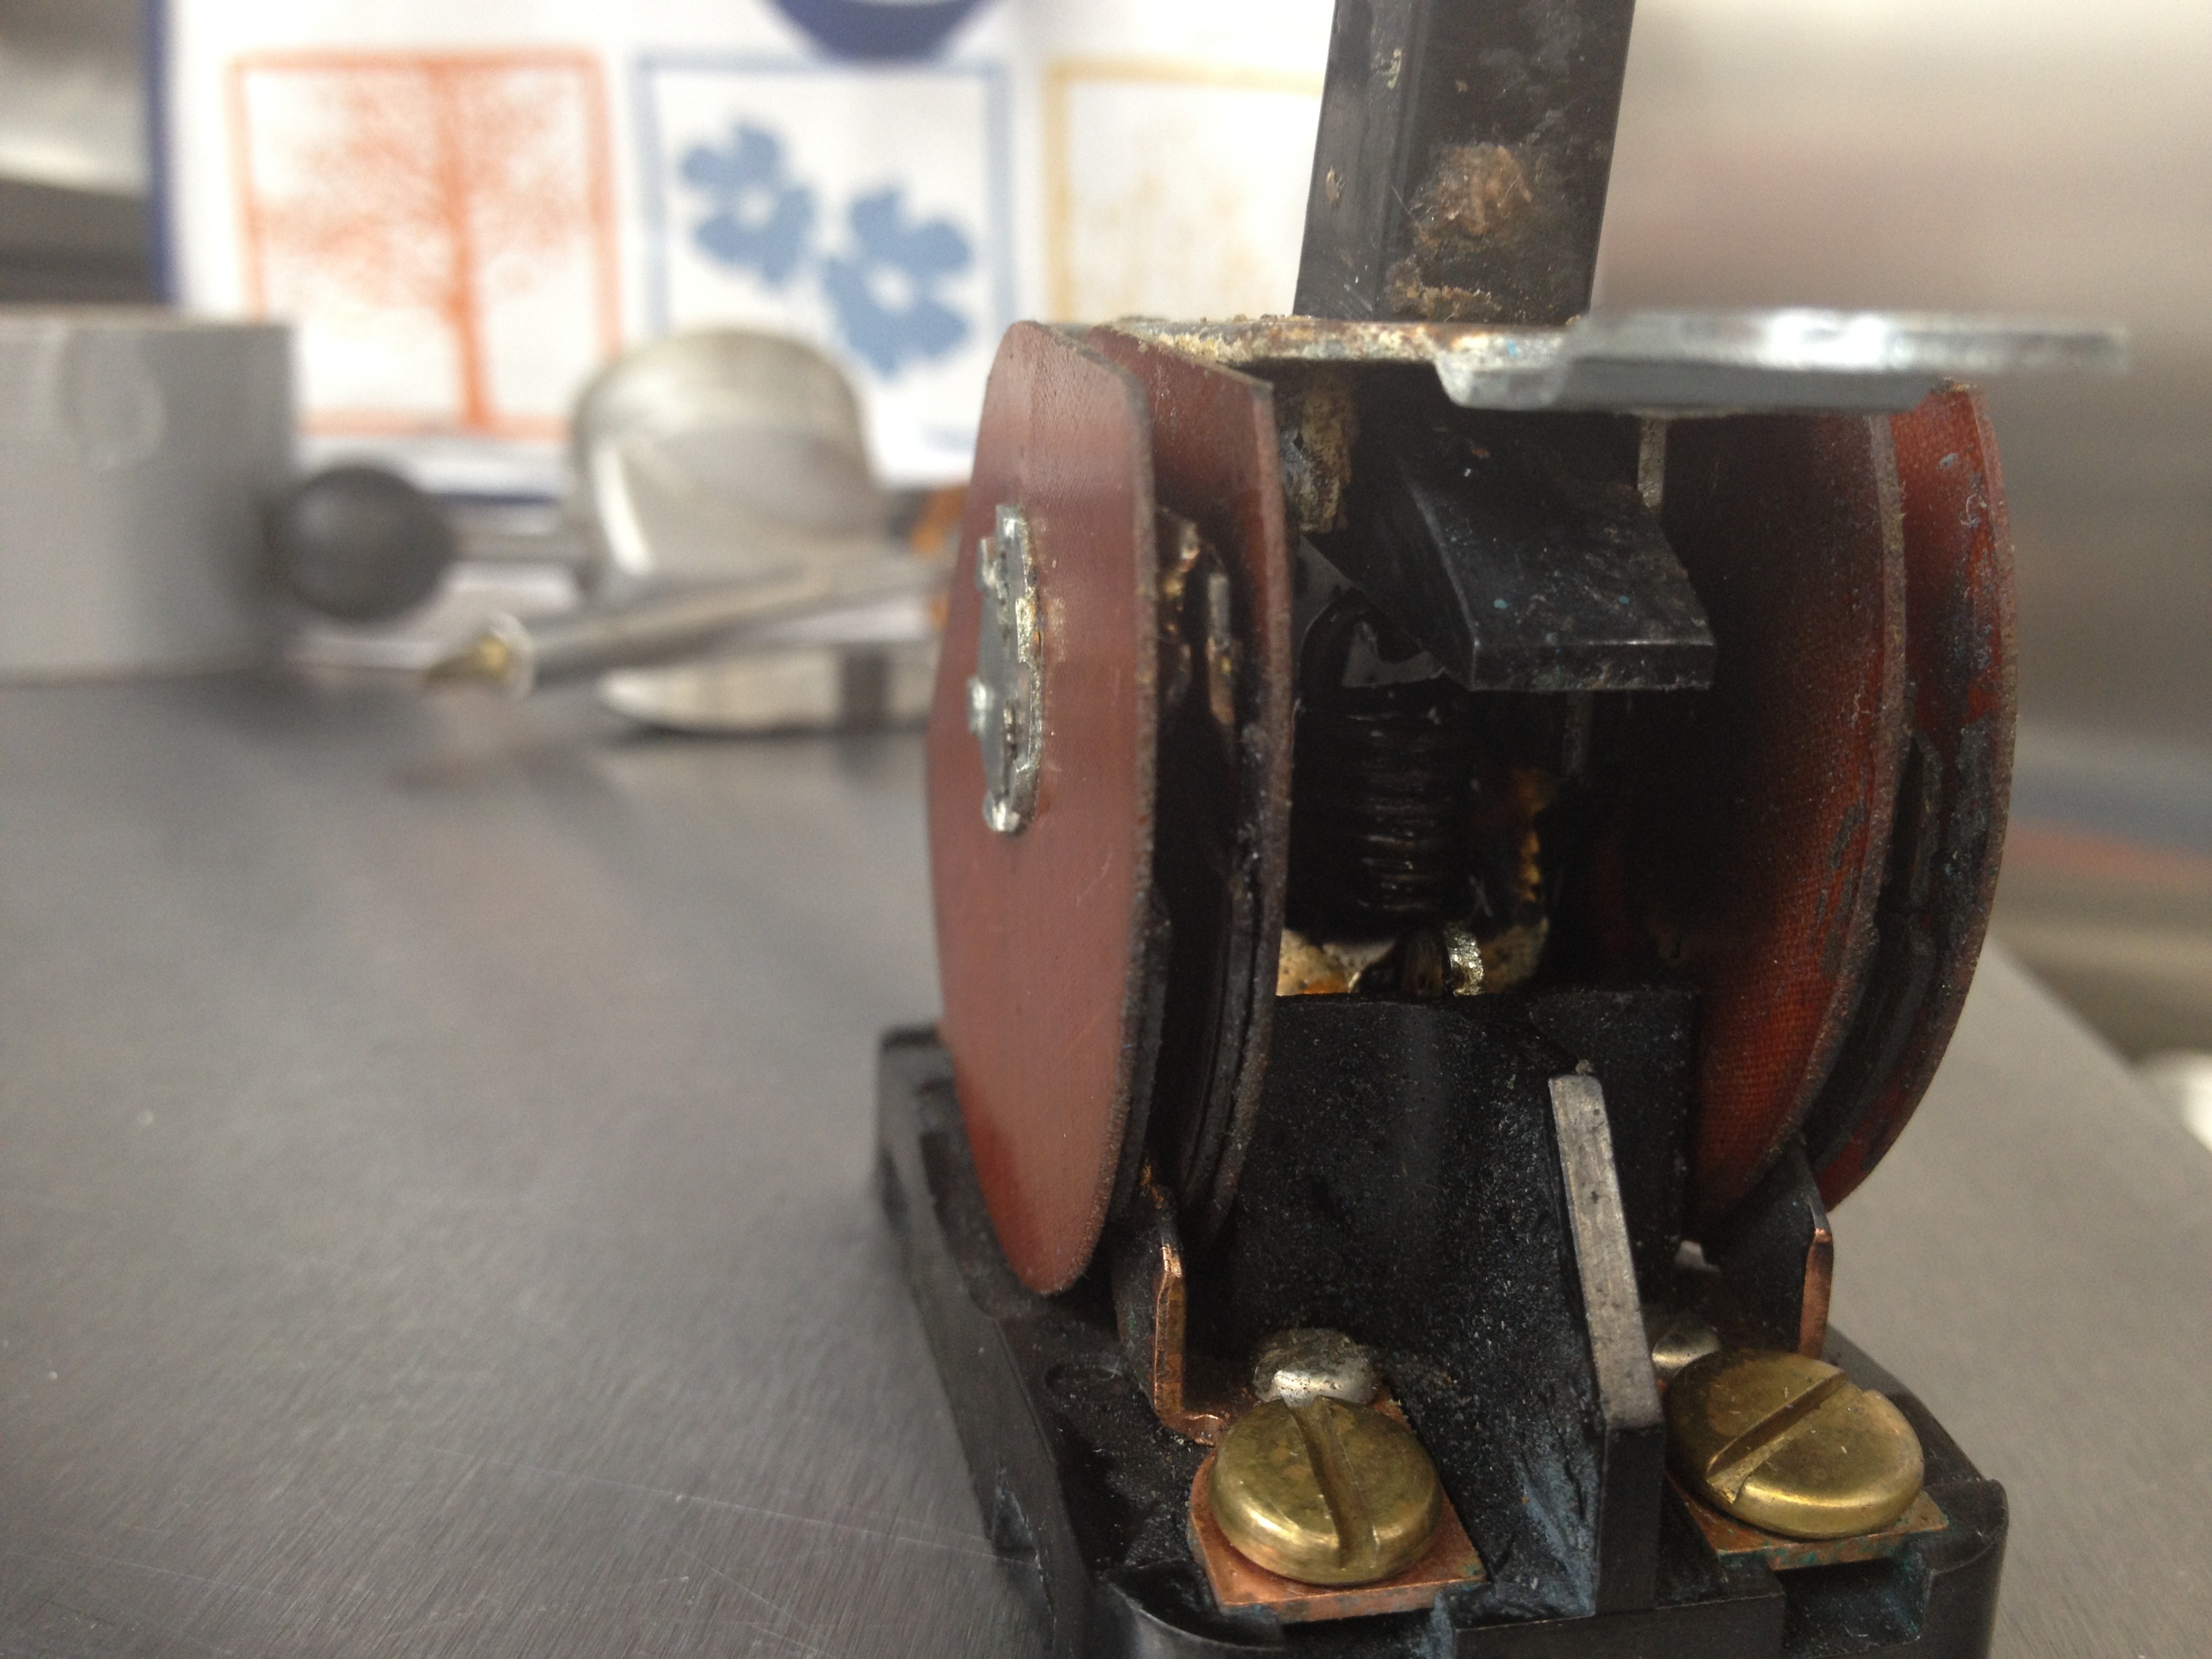 Ha! A very sorry looking switch. I found the part # online.
Called Hobart directly and was told that they stopped making this switch part over ten years ago, and the replacement part was on 3 week back order – that’s from the manufacturer! AND they wanted $240 dollars for the switch!! Not $2.40 but two hundred and forty! I found this Bryant switch for $24.00.
And my girlfriend’s business couldn’t spare machine down time like that, she was freaking out about having it down one day alone!
More searching and I managed to find a professional grade 220V Volt switch that is induction motor approved – very important here to get that kind or risk wear and damage to the motor. Apparently, among stronger internals they have a quick start and slow stop on the switch, mechanically built in.
I decided to get this switch, same maker as ancient original: Bryant
A Bryant 30002D switch. 220 – 250 V rated and 30 amp double pole switch.
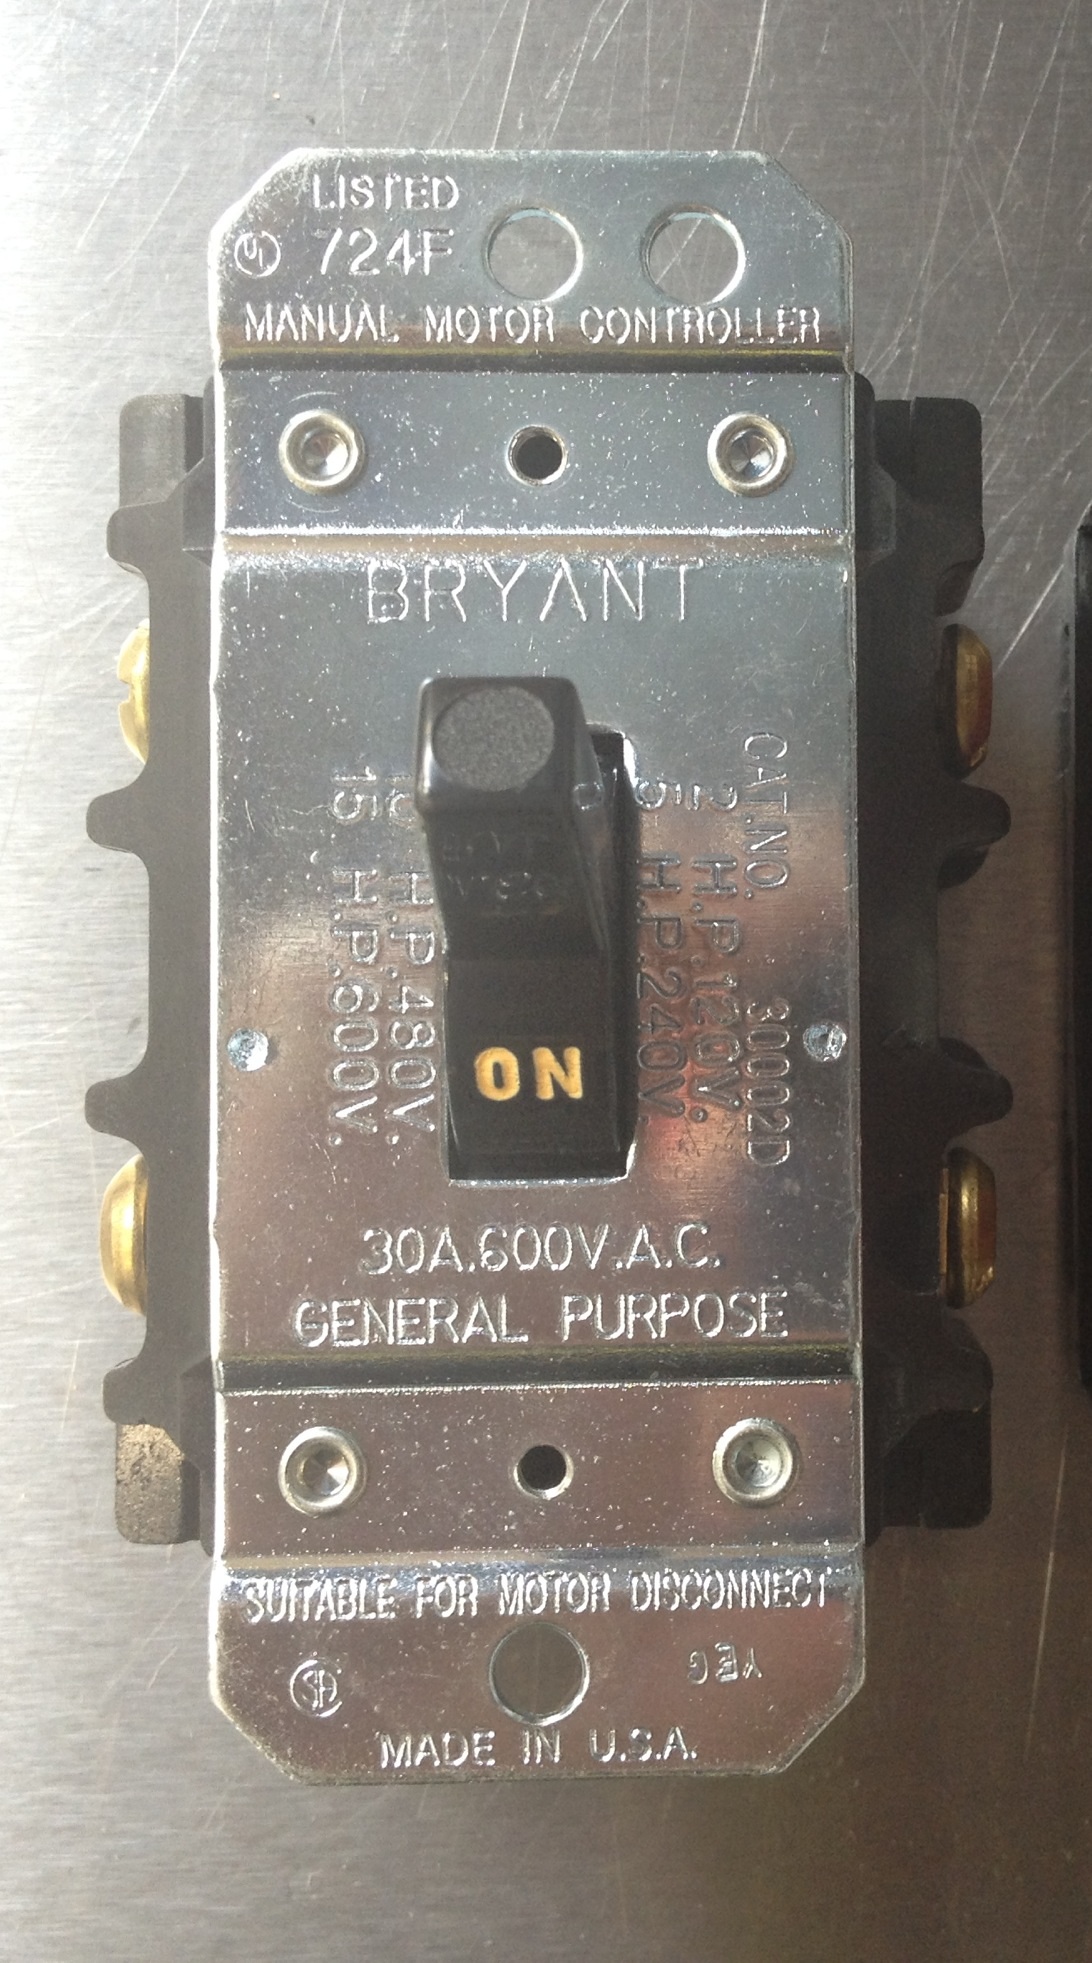
I searched all over for a wiring diagram and got nothing. Very annoying.
On a lark, I pulled off the rear panel at the back of the base and what do you know?! I’m staring at the original Hobart wiring diagram!
I’m posting the picture of it now here for others:
The Hobart D300 T wiring diagram:

Also of note out mixer was wired single phase 220V. If you don’t know what I’m talking about here you probably don’t want to mess with wiring. These can come from factory or be re wired internally I think to be 3 phase. So this whole post and wiring tips is based on single phase. The mixer plug is a 3 prong plug to a 220V outlet I built at the commercial kitchen space. Two black 110V hot wires run to outlet box with a ground as third wire. There is no neutral wire. The two black 110V hot wires connect at the plug and run to the mixer and join at the base the L1 and L2 wires that run up the mixer stand and to the switch area, they are switched to the motor via the T1 and T4 wires and the two 110V lines combine internally at motor and become 220V power, and this machine pulls 208VAC power off this 220V supply.
I checked all the wiring twelve times to make sure I wouldn’t destroy the machine upon flipping the switch. Incidentally, our machine was wired strange. It is a “timer” unit, hence the “T” model number. The timer was wired as a hot wire intercept right from the plug. It should have been wired after the switch. But it was backwards. It was obvious this machine has been worked on and tampered with before. The plug wire was not original into the machine. Had been altered.
The wires from the wall plug are oddly a smaller gauge than the wires that go from the switch to the motor itself. Makes no sense to me, but there you go.
The Bryant switch out of the box comes wired with the potential anyway to hot wire in the two 110V wires into the right posts on the switch. The output of these wires are inline and travel out the other side to the left. This way the switch can enable 220V “on” or kill both hot wires at the same flip of the switch to “off”. Good!
I verified this with my multimeter resistance testing the switch thoroughly. That’s the path, the upper right and lower left posts are not connected in either switch position, nor is the upper left and lower right. The current flows upper right to upper left. Lower right to lower left if switch is “on”. They are all separated when switch is “off”.
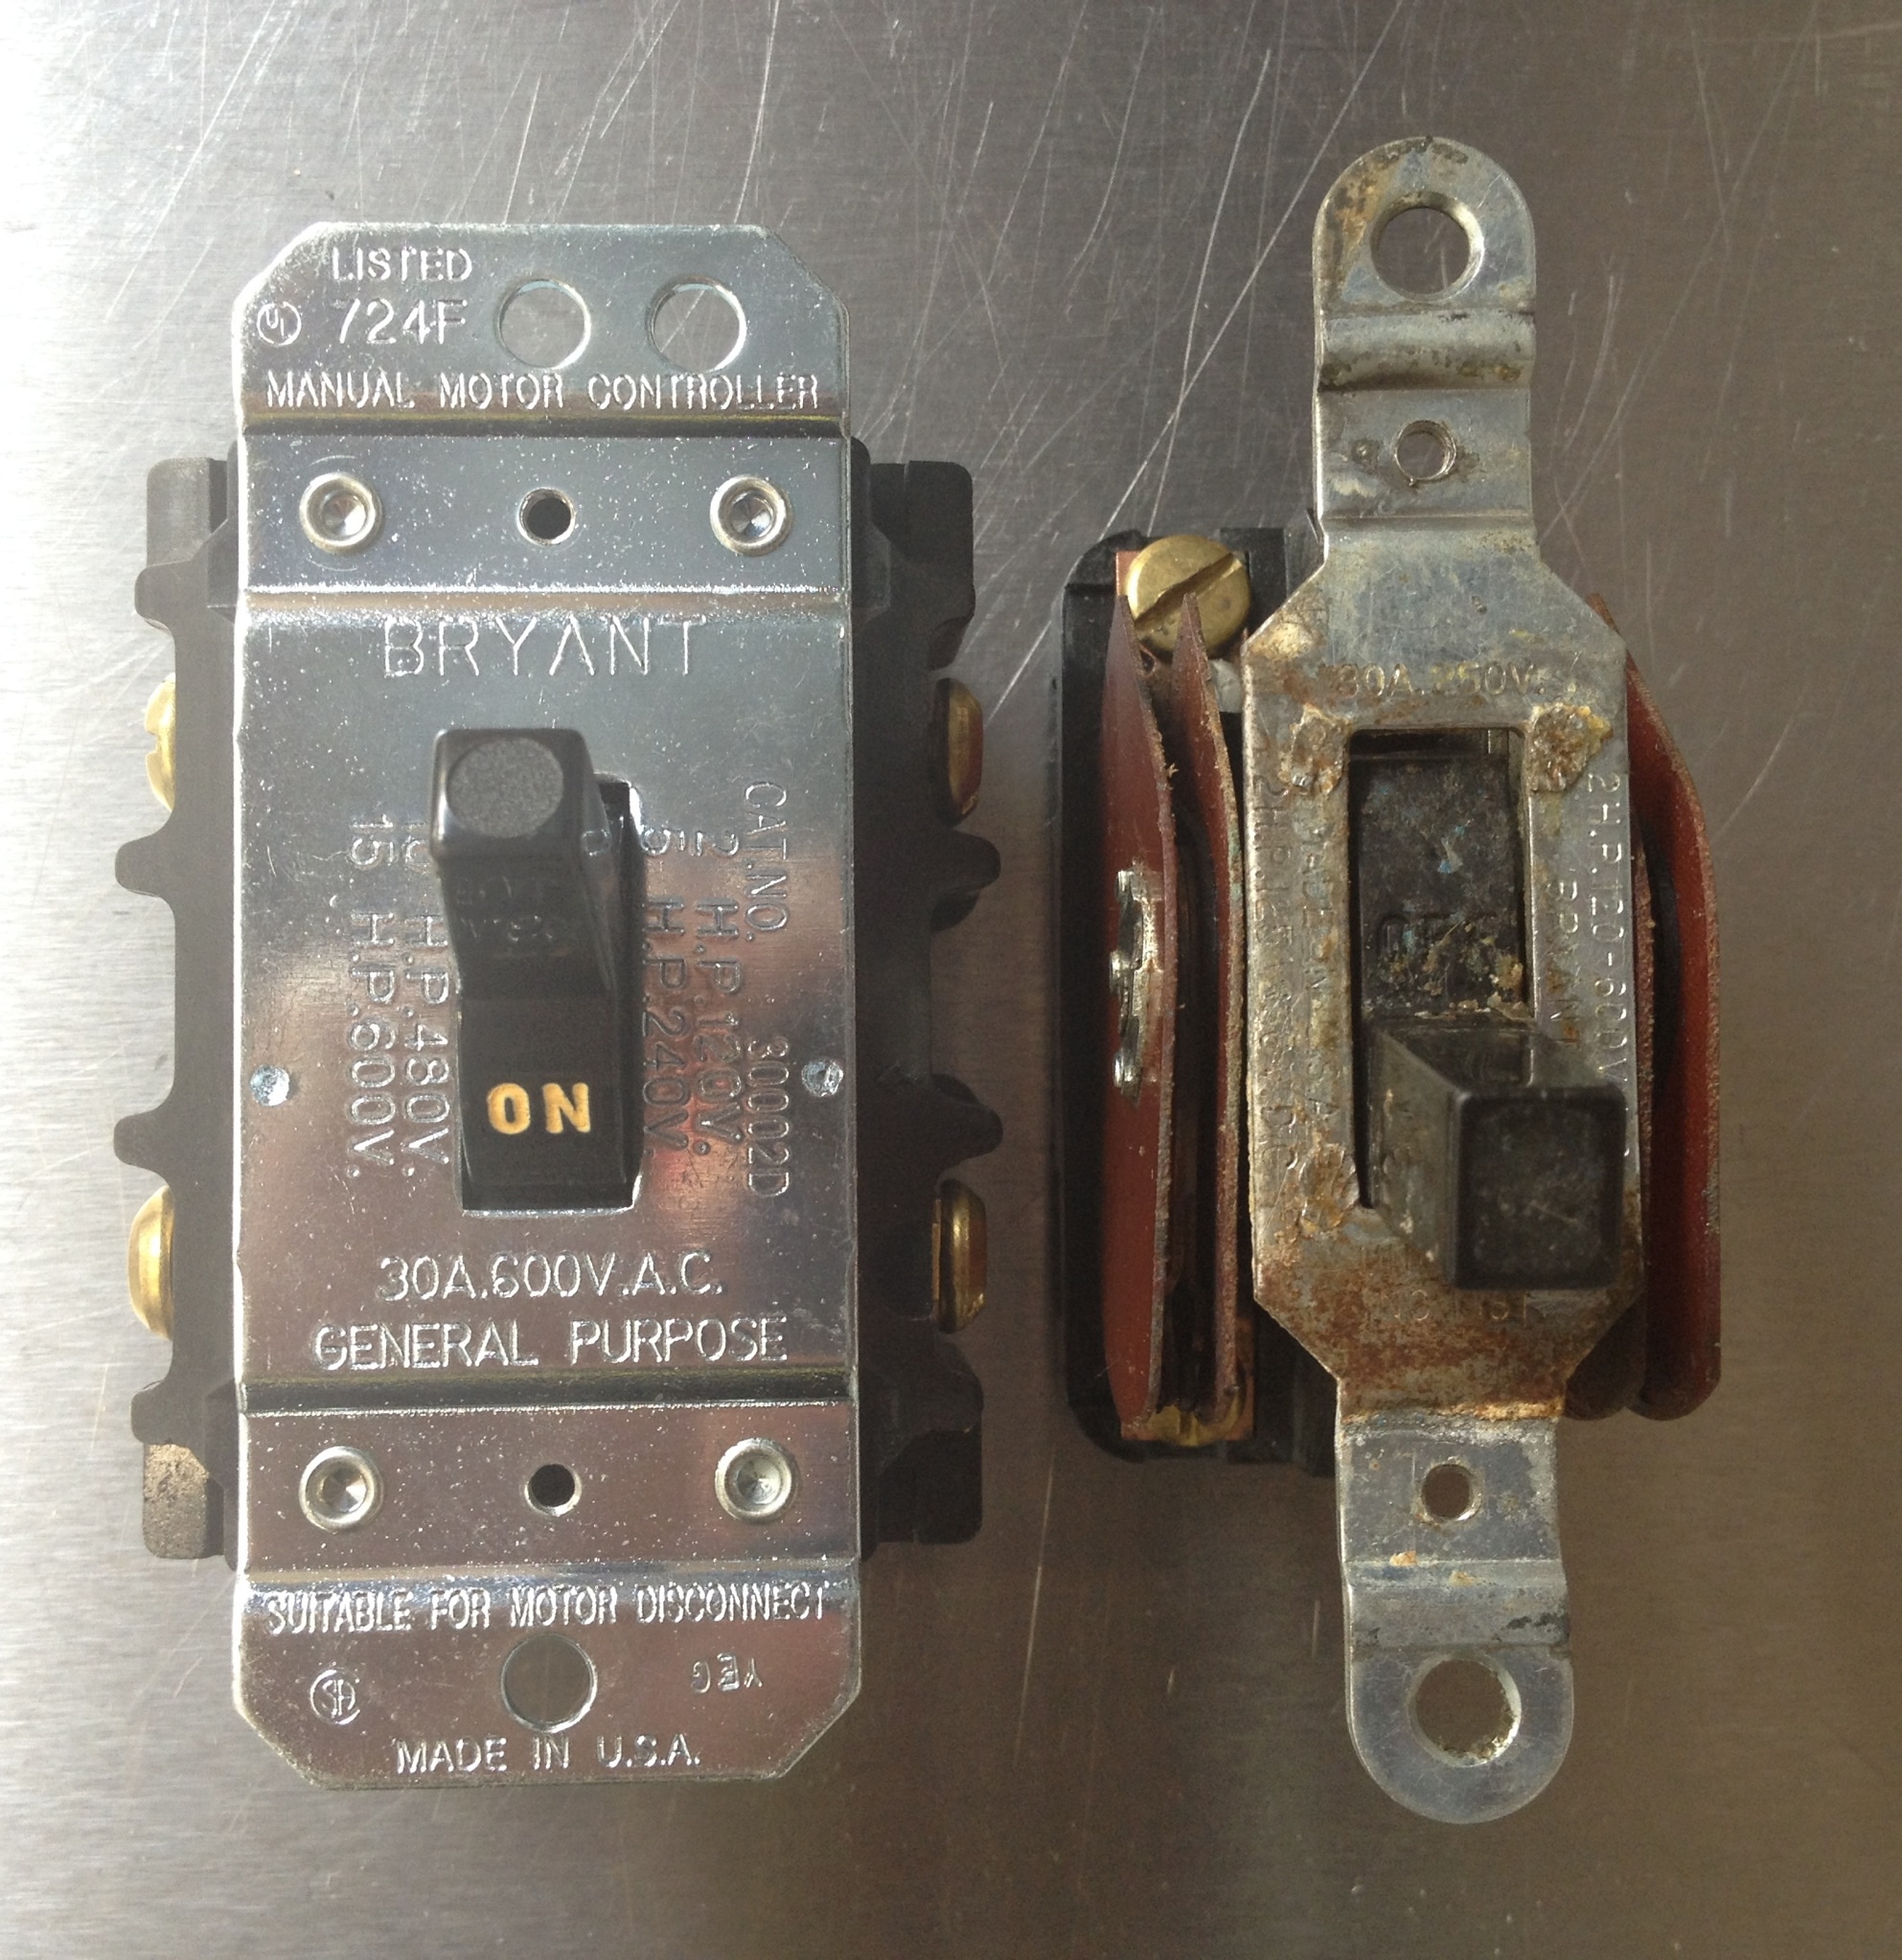
Here’s the switches side by side. The Bryant is larger, wider although not as deep which was good. But I still have a small clearance issue.
Asking owner what she wanted to do, I gave her three options:
A) I could fabricate a new custom aluminum plate with the switch slightly lowered so it could fit in the mixer.
B) chop the timer out of unit and cut 2 “slots” in the switch plate.
C) wait for shipment of new smaller switch. Or Hobart switch.
Since they don’t use the timer and wanted machine back running ASAP we settled on “B”. I used a drill bit to widen two of the Hobart stock metal plate screw mount holes to allow the metal cover to be shifted slightly clockwise, or right & down a little bit so the switch could fit inside the unit and clear the machine at the top of switch (now oriented “sideways” in unit).
Came back with the drill and had that part done in just about 15 minutes, drilling conservatively and re-checking and cutting away a little more four times. You can hardly tell the plate and machine has been altered at all with the 3 of 4 small screws back in.
Machine started up great – although I had one mishap and took out the whole unit by mistakenly direct connecting the two 110V posts with my meter on the wrong setting. I bypassed my voltmeter’s inner fuse and COM and + linked the two and had a massive arc and blew the units main 110A breaker and took out most of the units electrical. Being tired and not thinking clearly…
Scrambled to find a suitable replacement breaker and everything was closed being so late. Five hrs of sleep and off to only commercial electrical store nearby open Saturday at 7am to get the breaker and install it and get unit back powered up!
See the two points I direct connected with meter. Not good:
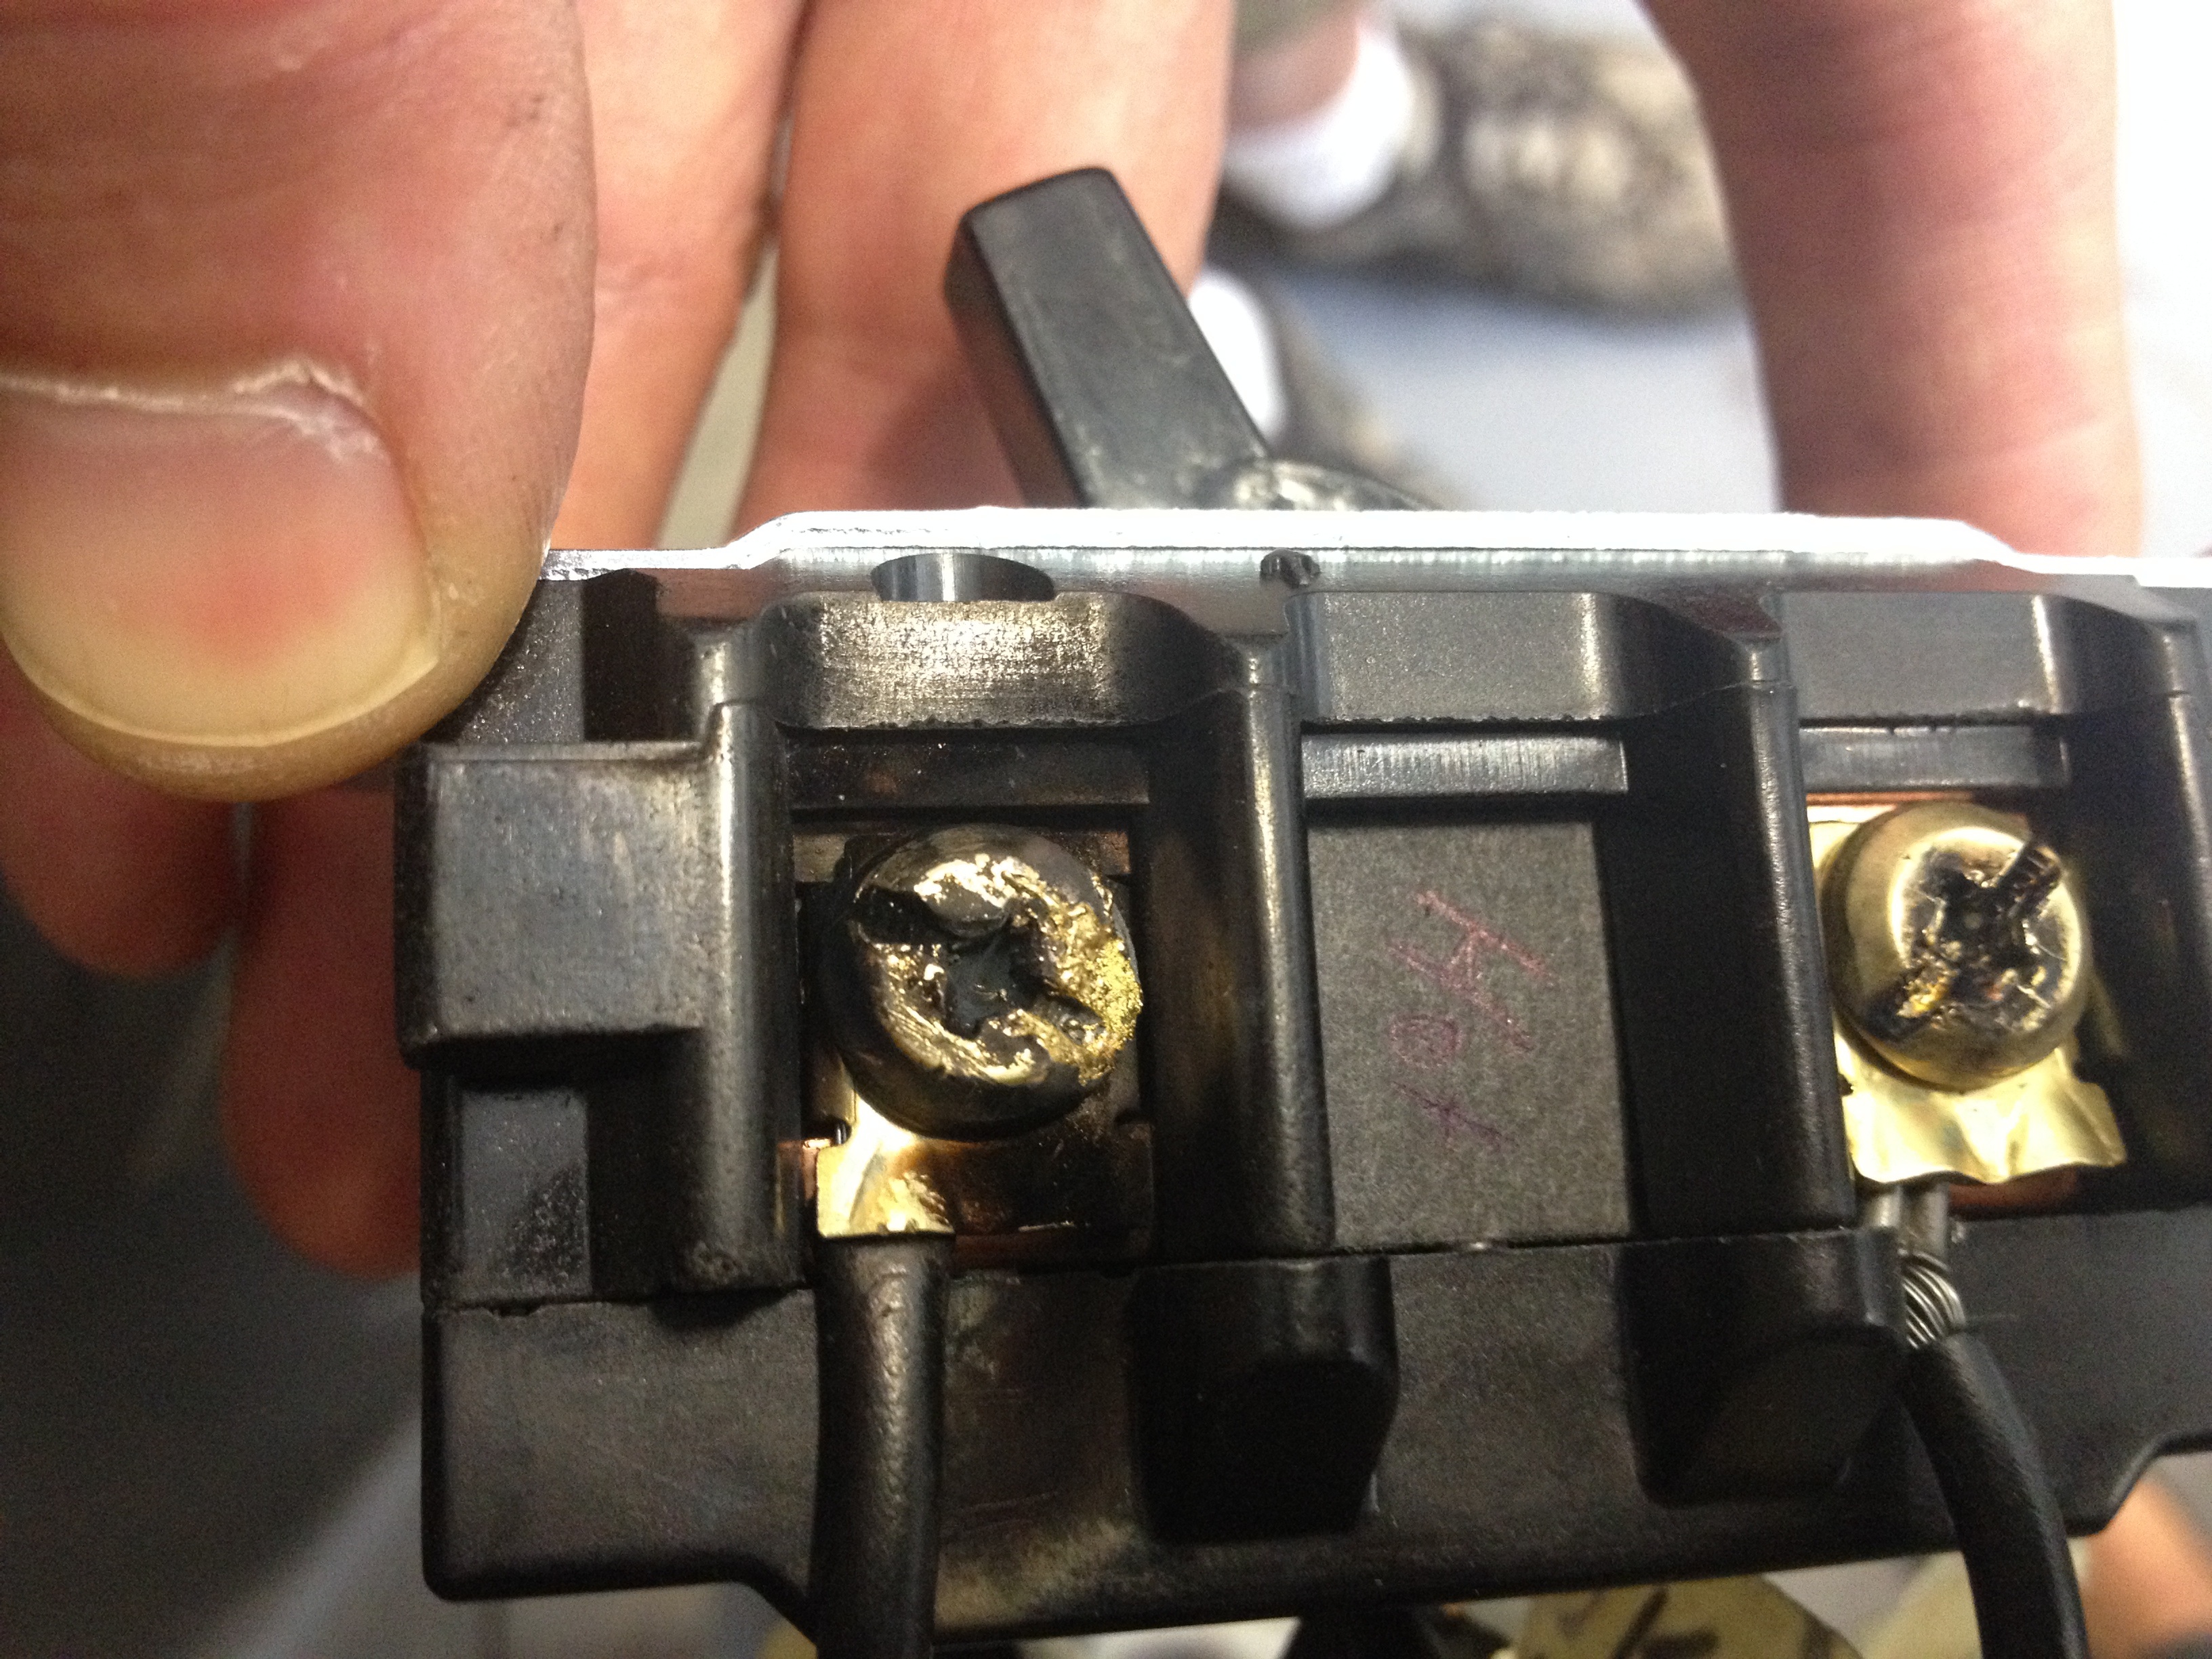
Last pic is my wiring notes. Both the Hobart intended wiring and the way I wired in the new switch. Our mixer had clearly marked T1, T4, and L1 and L2 numbers on the four wires. I also verified them with metering continuity.
And then! Everything worked great. Mixer back mixing up a storm.
Viva la Revolucion! (Muffin Revolution).
