How to replace Clutch on your ZX6E Ninja. Easy, step by step how to DIY
In my opinion, this is a very easy job and not much harder than changing oil or spark plugs.
Easier Tips: An easier way to is drain your oil. You can gangster lean the bike a lot towards the kickstand side of bike. I’ve read pushing bike onto 2x4s and using sidestand should make it not leak much when you pull the clutch cover, but I was near my oil change interval anyway, and figured I’d rather have more secure stable bike to work on, on the centerstand.
I also pulled my clutch lever in, then held the lower clutch lever down below on right side in place with a short 2×4, and disconnected the cable at the handlebar. I then rotated the lower clutch release rod, it’s attached to the hinged lever down on the lower right bottom of the clutch housing where the clutch cable hooks into. The rod is inserted up inside the clutch housing. Rotate the rod gently to free it, and then slide the rod out the bottom of the housing.
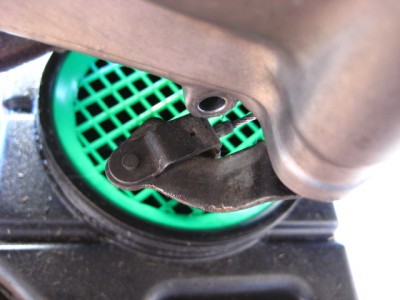
1) Drain oil (or not – see above)
2) Unbolt the clutch cover.
It’s the lower right large cover on side of bike, where your fill up your oil. There are about ten 8mm sized bolts you need to remove here. With the old gasket installed, it may be a little stuck on there, I gently, and I mean gently, gave it some taps with a 2×4 scrap to help free it.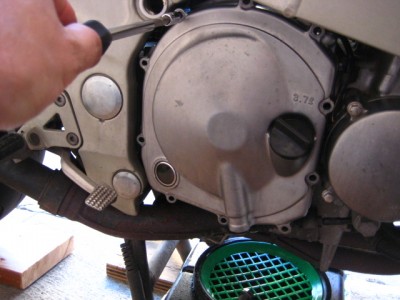
3) Remove the cover.
Voila! you’re looking at your clutch assembly. Yes, it’s this easy.
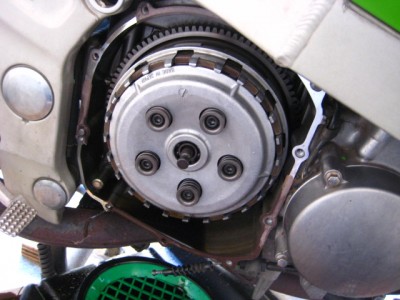
4) Remove the five allen bolts that hold the clutch springs in.
They are long bolts and unscrew slowly, so don’t worry the springs aren’t going to shoot out at you or anything. You now will see your clutch metal plates and friction plates all stacked in on the clutch basket.
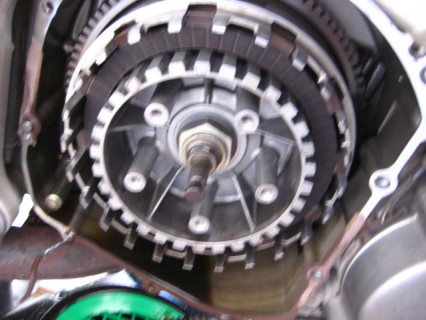
5) Remove metal plates and friction plates.
Just pull them out with your hands. Keep track of the order of them as you remove them and stack them. Basically, they alternate a friction plate, a metal plate. 7 friction plates in total. These are what you will want to replace with your new clutch kit (along with springs most likely). My inner most one was worn to 2mm, way too worn. They need to be at least 3mm, and a mm here or there spread out over so many plates adds up! (That’s what caused my clutch release rod to slip out, not enough thickness overall to the clutch plates due to wear. And picky shifting needed with the clutch this worn. I had lengthened my clutch cable {loosened} it to the maximum length and had nothing left.)
Look at your metal plates too. If you cannot see the little ‘dimples’ in the plates, they are almost certainly too worn down. 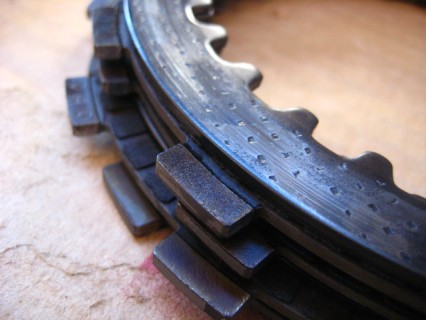
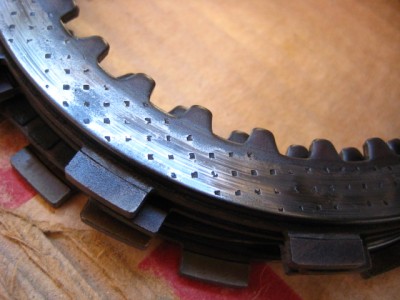 The divots just give the oil a place to hang out, and help keep the plates lubricated and freer. Check for excessive wear, and warpage. Easy way is place the metal plates flat on a piece of glass and try to slide some thin gauge feelers under them at numerous spots. Anything over .05mmm means they are warped. You should consider replacing warped or very worn metal plates. Otherwise, most people sandpaper the surfaces a little to scuff them up and reuse them.
Here, I scuffed the metal plates up with Emery cloth ‘fine’ sand paper:
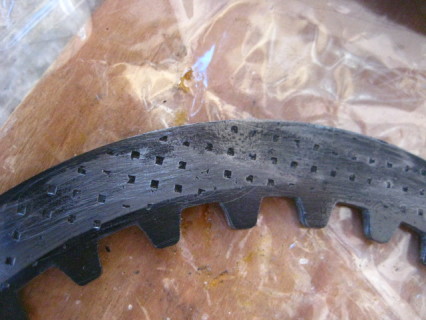
6) Soak your new clutch friction plates in your motor oil for at least 30 minutes if not longer before installing, this helps avoid excessive wear on the dry plates on the first startup.
7) Remove all the old gasket material on the cover and the motor side.(I carefully used a razor blade).
8) Reinstall your new friction plates and metal plates alternating. The final outside plate does NOT go in the same deep slot grove in the clutch basket like the others do, rather it gets rotated slightly and fits in it’s own separate tab. 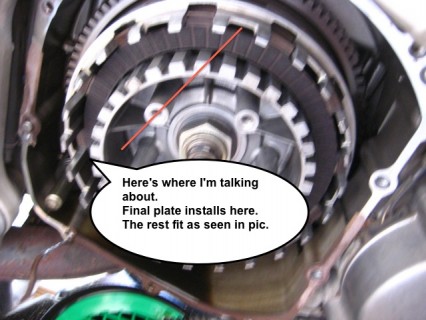 You can see that outer shallow tab opening in the above clutch housing photo above. See where the red line is pointing to at the top (not where the white text bubble has a small pointer). This is important to get this correct to avoid clutch slippage later.
Replace your new springs unless you decide to use your old ones.
9) Fit your new gasket (or something like Permatex gasket maker), and mount the cover and rebolt it in. I make my own from FelPro gasket paper.
Here are my new friction plates installed. Notice the outside friction plate is aligned in separate cutout tab in the clutch basket.
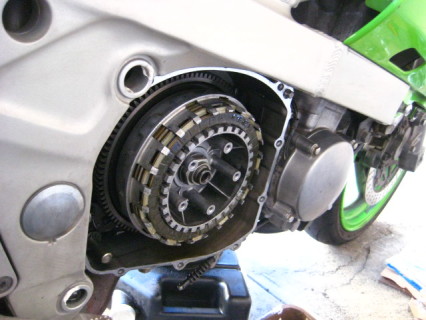

New springs and cover installed:
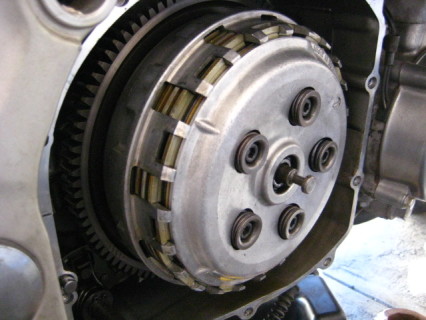
Reinstall your clutch cover and tighten according to the torque specs, which are 8.8 Nm or 78 in-lbs. They are not super tight. Push back in your clutch rod if you removed it, make sure to gently insert it and rotate it so it catches on the clutch release pin under the cover. Also, hook back up your clutch cable if you released it.
If you drained oil, add new oil. Make sure to not sure regular 10W40 auto oil, it has friction modifiers which can make the clutch slip.
Now make sure to adjust your clutch cable as it will be different from a worn out clutch. Adjust at both the handlebar and by the clutch housing the cable adjusters.
You can find special motorcycle Valvoline 1040 wet clutch safe oil, for example. I’ve used that the past two oil changes but I decided to switch to pure synthetic oil this time around doing my clutch to Shell Rotella T6 5w40 diesel oil. I’ll post on this blog how I like it, I’m hoping to have cleaner, smoother shifts!
UPDATE: I love the new clutch and I’ve ridden several thousand miles on it with the new Rotella T6 synthetic oil. I have much much smoother shifts with the new clutch.
Posted in DIY, repair and tagged clutch, clutch plates, DIY, friction plates, how to, Kawasaki, Replace, replacement, yourself, Zx6e, zzr600 by green