Just did SMD 5050 green LED dash swap! Finally installed ram air tube guards.
 Removed gauge cluster quickly. And then got bogged down with installing the ram air tube guards. They have been missing since I bought the bike and I got these spares from a parts bike awhile back. Had to remove the entire front nose fairing and headlight off the bike to get them in the fit is so tight.
Anyway back to lighting. I bought a single SMD 5050 green LED strip some time back and finally got the time to work on it.
Also got interrupted by phone calls, and having to pick up production gear for a shoot on monday. Grrrr.
Resumed work after moto ride to berkeley be had to re put back in pulled gauges. Driving 60 Mph on fwy with no windscreen at all isn’t as bad as you might think.
I got the tach threaded and then the speedo with a lot of small custom solutions with spare wire and rubber protectors. When I put it all back in, the speedo strip wasnt lighting at all. Took awhile for me to figure to diagnose it with a AC / DC wall wart inside instead of constantly on and off the bike.
I discovered my new soldered wires to the cut factory strip were not working at all.
So Sat am back to work, read about “tinning” the wire and circuit ends first then joining w solder. And that worked great! Now they both light and are much brighter and custom green to boot.
_________________________
Step 1: remove windscreen, and inner gauge plastic dash surround cover, just two screws to remove that part. (Your bike should not look this dirty). 
Step 2: unbolt these two bolts to free up gauges. Do not unbolt upper ones, this whole unit comes out a lot easier with removing the (2) lower 10mm bolts, I’m pointing to left side one.

Detach two electrical leads shown to the gauges, and also the speedo cable that I’m pointing to. The whole thing is now free to lift out.

SMD 5050 strip that I soon cut in half shown also:

So from the backside, locate one of the bulbs that lights up the tach or the one for the speedo and pull out the rubber seal with bulb. You’ll want to tap into the 12V

Next – unscrew the clock faces, just the two little screws so you can have the room you need to wiggle in the SMD strip. I leave the faces loose but don’t remove them.

Here’s the SMD strip wrapped around the tach now. I attached a wire into the bulb holder, passed the wires through the opening and pulled them down to the bottom of gauge area. The black and grey wires are back fed through the stock bulb openings. I wired these extra wires into bulb socket and then attached them to the LED strip leads.

Here’s the wires I fed into the bulb holder, I had some extra car stereo connectors and used that, and then jammed a piece of plastic in between the leads to isolate them from each other. I then stuffed the rubber socket holder back into the back of the gauge cluster to keep it watertight. I can also go back to stock bulbs if I want to this way.

Close up on the speedo and strip tucked behind it.

Here’s the tach plugged in and running!
It’s not too bright at all, just right I am guessing. I don’t think I’d want it any darker so the 5050 SMD extra bright really helps. The super bright green outer circle will be covered up with the gauge plastic cover.
The gauge plastic covering is off and it’s not bolted back in. (I had a problem with the speedo one, apparently my soldering of the cut other half of the strip did not go well). It looked good but won’t pass 12V down it. Hmmm.

Sweet! I just got speedo strip 2 working. I “tinned” the wire first w solder and let it cool and used the factory end of the LED strip where it had been “tinned” at factory and pressed them together and added more solder and voila! Full install pics and nighttime matched exposure picture coming later.
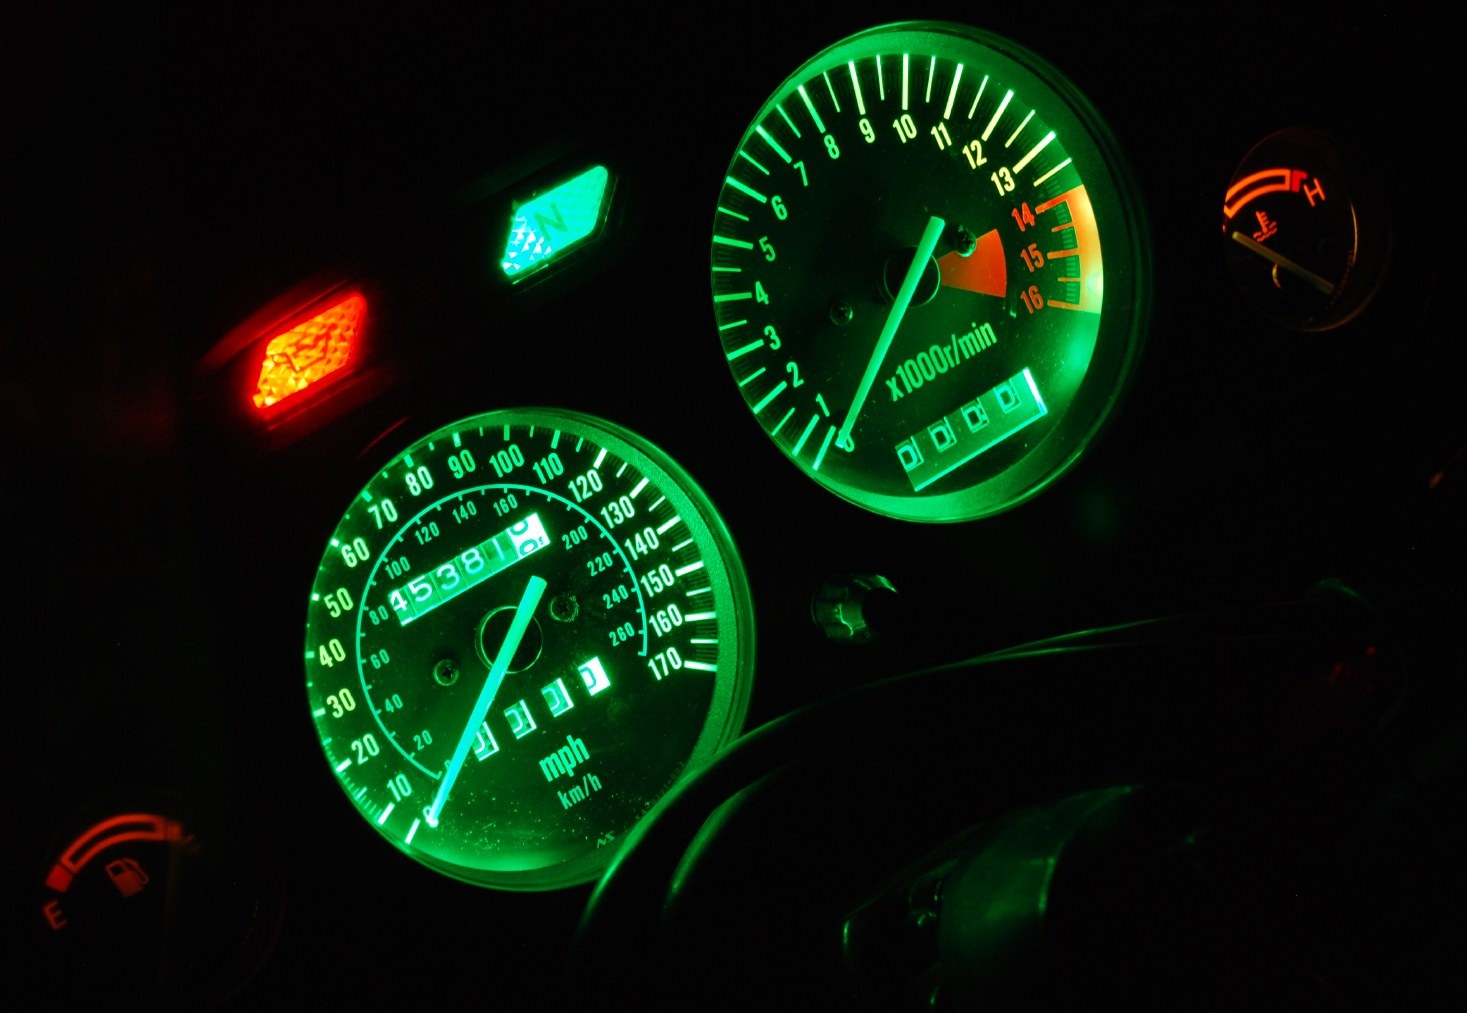
Here’s the installed new dash gauges. The green is a really rich nice green to the eye. Same exposure as first picture. 1/2 second shutter, ISO 400, lens f5.6 , 55mm zoom, I only slightly modified the White Balance to make it a little greener as it looks to the eye.
Comparison to my (crappy) stock old lighting. Note the speedo bulb was in fact burned out, so that upper area would have been a little brighter as stock.

Posted in DIY and tagged gauges, LED, SMD, swap, upgrade, Zx6e, zzr600 by green
DIY waterpump rebuild (proper thread). Published from old zzr-international.co.uk site by dirtdoggle
DIY waterpump rebuild (proper thread)
Postby dirtdoogle » Tue Aug 21, 2012 11:43 am
I apologise in advance for my poor pics, nerve damage in my right wrist makes me shake a wee bit 😉
What you need:
A ZZR4/600/K/D, haven’t done one on the N/E but I think they’re the same
10 and 8mm spanners
Many hammers
Cigarettes
Socket set
Assortment of decent screw drivers
Circlip pliers
Extensive knowledge of grunting and swearing
Bearing puller really, really helps
Parts: Loctite sealant or similar
A wee bit of grease (if pedantic like myself)
Bearings: Two 12x28x8 stainless steel and must be 2RS sealed type (these cost me a grand total of $5NZ)
12 x 28 x 7mm radius oil seal
12mm external circlip
Rear water pump o-ring http://www.ronayers.com/ProductDetails/ … KU/1088282
Front water pump housing seal http://www.ronayers.com/ProductDetails/ … KU/1088281
Righto what you want to do:
Remove your bottom fairing (no pics, my bike obviously hasn’t got one, fairings are silly)
Drain the coolant, if unsure of how to do this, step away from the bike and go have a coffee.
Remove both hoses to the water pump
Un do the top and bottom 10mm bolts on the front of the pump
Ease the pump out
Now the fun begins.
Remove the remaining bolts from the pump cover and open ‘er up
Should look like this, hopefully…
Image
Now flip it over so you’re looking at the back
In theory, you’ll be looking at an oil seal
Image
Pop this wee fellow out and you’ll be able to see a circlip on the shaft holding the bearing in
Whip that out with the previously mentioned circlip pliers (or get real handy with a flat blade screw driver…)
Now you can grab you hammer assortment! Yay!
Place the pump on blocks of wood, impeller facing down and make sure it’s not hitting the wood
Gently drive the pump shaft out, this may require the grunting and/or swearing you got yourslef before starting this job.
Once you’ve managed to get the impeller and shaft out, flip it over and you should see this
Image
I didn’t need to replace this seal on mine, but do note how it sits on yours (this seal causes a lot of drag, I’m currently trying to think of a mod to get rid of it)
Ease it off and you’ll see this
Image
If not, you’ve started working on the wrong bike and it’s not my problem
Now, select your favourite long screw driver (unless you have a bearing puller, then you win) and drive the bearing on the engine side out, heat can help here, I’m a sucker for making shit hot, so I put it in the oven for half an hour at 150 celcius, made life superbly easy!
Once that bearing is out, flip the pump, burn your hands (oops!) and gently tap the other side out, I used a socket and wooden mallet for this one and being heated, they popped right out (the pump I did before hand wasn’t heated and was a prick to do)
Now you’ll have a completely empty water pump! The end.
No not really…
I’m sorry for the lack of pictures, most of the ones I took are too blurry to make sense 😆
Clean everything, I cannot stress this enough, if you’re spending time doing something like this, make it perfect
Is it clean yet?
Good.
Insert the new impeller side bearing and gently drive it in, makes life easier yet again if the pump is a bit warm, and I always put bearing in the freezer before installation, easier than peeling a potato with a gun.
It should look like this Image
If not, you’re a womble and should stop sniffing glue
Clean this wee thingy Image I used brake cleaner and a razor blade, but I’m slightly pedantic.
Apply a very thin smear of the loctite sealant stuff, or whatever is on hand (blood, feces etc)
It’ll push right in if you freeze it… otherwise, get a socket (I think 16mm was about right) and very gently tap it in
Once that’s nice and snug, fit that odd little spring loaded washer/seal, making sure it’s alligned correctly on the little dimples.
I think fitting a teflon washer between that and the impeller will get rid of the ridiculous drag it causes
Now, find the impeller, put a thin smear of grease on it and push it through (yet again, heat/cold parts help, but hammers work too)
Once you have that in, insert the new bearing in the engine side, double check that the impeller has clearance on the housing too, otherwise you’ll have a big mess
Fit the circlip
Apply a tiny smear of the sealant rubbish on the outside of that new oil seal and push it firmly in to place.
Don’t forget that new rear O-ring!
Flip it over again, check you’ve still got clearance on the impeller
Mount the housing on the motor and turn the impeller until you feel the shaft slip in to place of it’s drive
Clean the mating surfaces on the housing, fit new seal (or just use more sealant, not my problem)
Fit the from cover and bolt ‘er up
Polished front is optional and not worth doing on a faired bike
Image
I hope this helps someone, it’s long stupid and rambling, but you’ve made it this far and good luck to you
Will update once I have found a decent alternative to the inside seal 🙂
———-
Green Magic Man (me) add this to the post:
I thought I should pass along this research. An Italian at the German zzr site said he did his ZZR600 D model water pump with this Honda part which is the same seal for the oil seal in the Kawi.
Part # 91201-mf2-003
I looked it up and it shows up indeed as:
Honda 91201-MF2-003 OIL SEAL (12X28X7) — OIL SEAL ( 12X28X7) (Honda Code 2073054), OIL SEAL …
For US $3.50 at partzilla, US $4.50 at local Kawi dealer.
I will order one and try to confirm this fits in my ZZR600 water pump. I think that enables me to source all the parts at this point.
This was the post:
http://www.zzr-rg.co.uk/forum/viewtopic.php?t=5163
Also, cross referenced another part, this one is a Kawasaki part a forum poster says fits too:
92049 1416 said this fits but is not common knowledge it fits most Kawasakis.
And same guys says this for the mechanical seal part: 49063 1055
Here is my source thread for this: http://www.kiwibiker.co.nz/forums/showt … -weep-hole
—
I can indeed confirm this Honda oil seal part fits the ZX6E / ZZR600 model :clap: :
Honda part #: 91201-MF2-003
description: OIL SEAL (12X28X7)
price: US Dollars $4.99
I had to special order the part and installed it today. Very nice fit. This is the oil seal that goes around the impeller shaft at the very end (not the wider O Ring that goes around the water pump impeller housing.
Posted in DIY, repair and tagged DIY, how to, Kawasaki, rebuild, water pump, Zx6e, zzr-international.co.uk, zzr600 by green